 日本語
日本語  Deutsch
  English
  Español
  Français
  Português
Grow Your Own: The Ultimate DIY Raised Garden Bed
Are you thinking about a DIY project that your wife or significant other will absolutely love? Building a raised garden bed is the perfect blend of thoughtfulness and practicality. It's a gift that keeps on giving, and she will be thrilled with the results of fresh vegetables, delicious berries, or a beautiful array of flowers.
Best of all, a well-placed, thriving raised bed will quickly pay for itself in produce and beauty, making it a truly smart and loving gesture.
Raised garden beds are the "gold standard" for home gardening because they provide superior drainage, keep soil from compacting, and act as a natural barrier against weeds and pests.
This specific design focuses on durability and simplicity. We’ll be using cedar, which is naturally rot-resistant, ensuring your garden bed lasts for a decade or more without the need for chemical treatments.
Step-by-Step Instructions
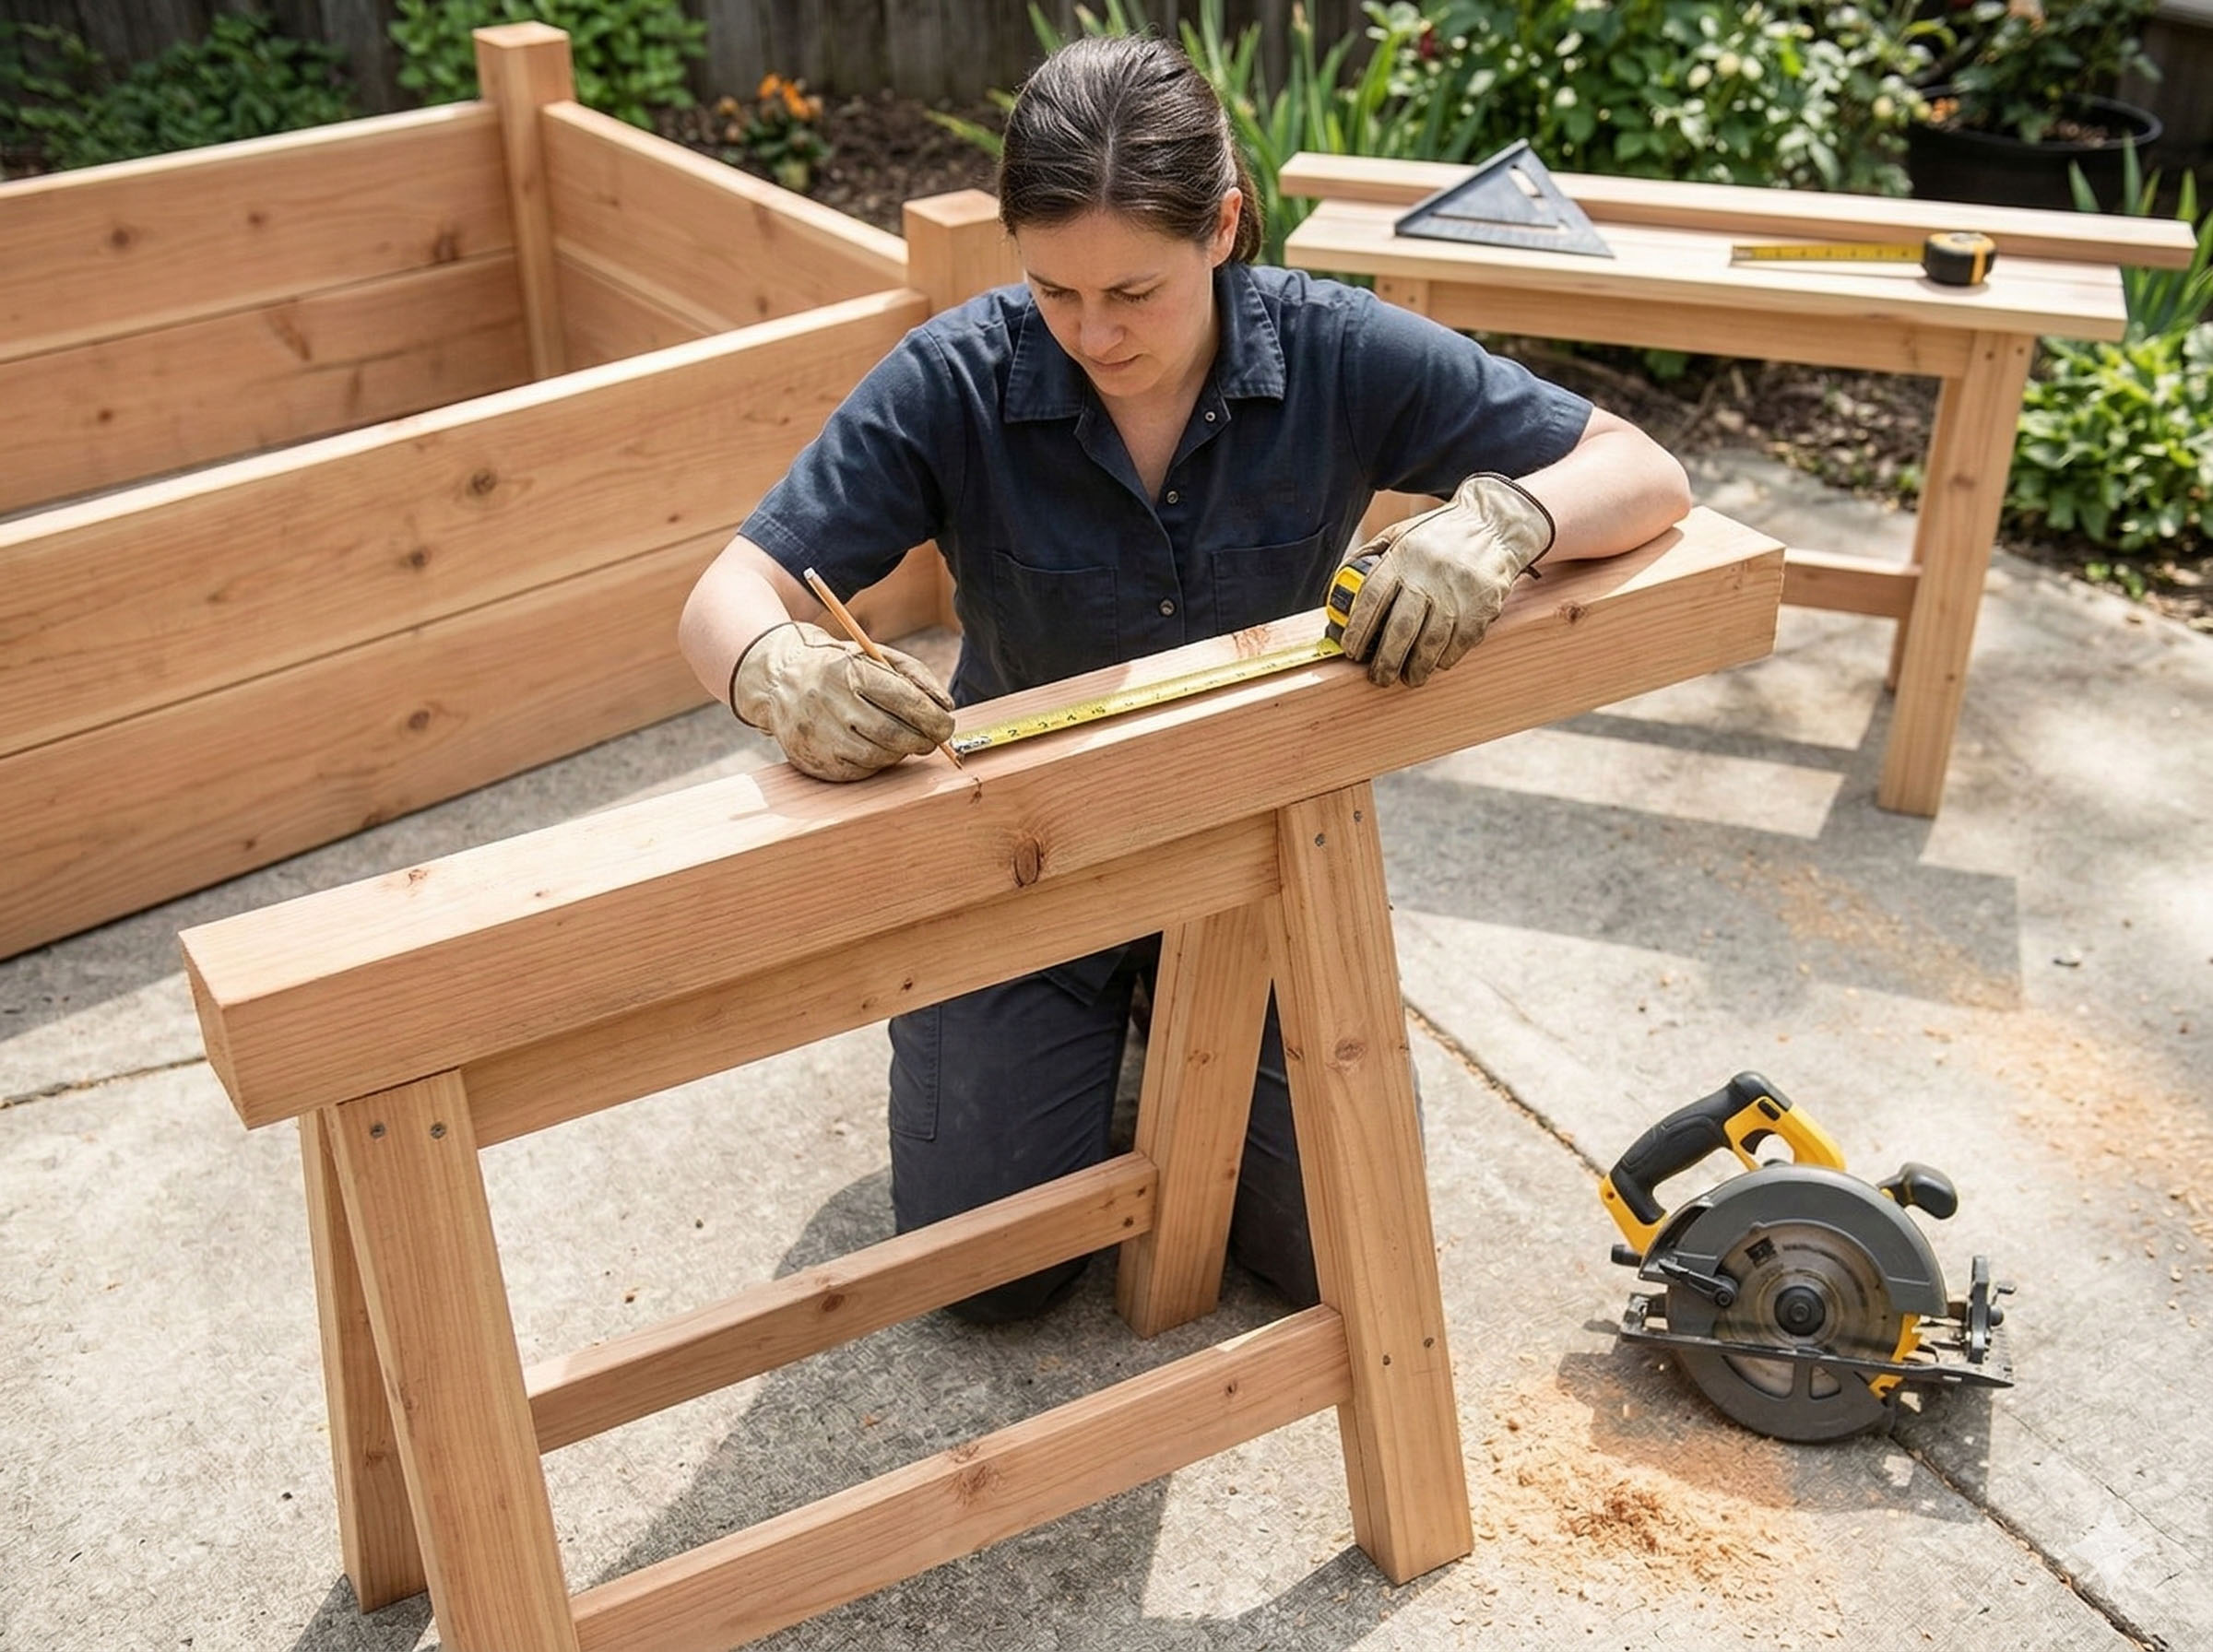
Step 1: Measure and Cut Your Lumber
Cut four of your 8ft boards in half to create 4ft sections. You will end up with four 8ft lengths for the long sides and eight 4ft lengths for the ends (stacking two high). Cut your 4x4 post into four 12-inch segments to serve as corner supports.
Pro-Tip: If you don't own a saw, most hardware stores will make these basic cuts for you for a small fee or even for free!
Step 2: Assemble the End Panels
Lay two 4ft boards flat and place a 12-inch corner post at each end. Align the edges so they are flush and screw the boards into the posts. Repeat this for the other side.
Pro-Tip: Always pre-drill your holes. Cedar is prone to splitting, and a small pilot hole ensures the screw goes in smoothly without cracking the wood.
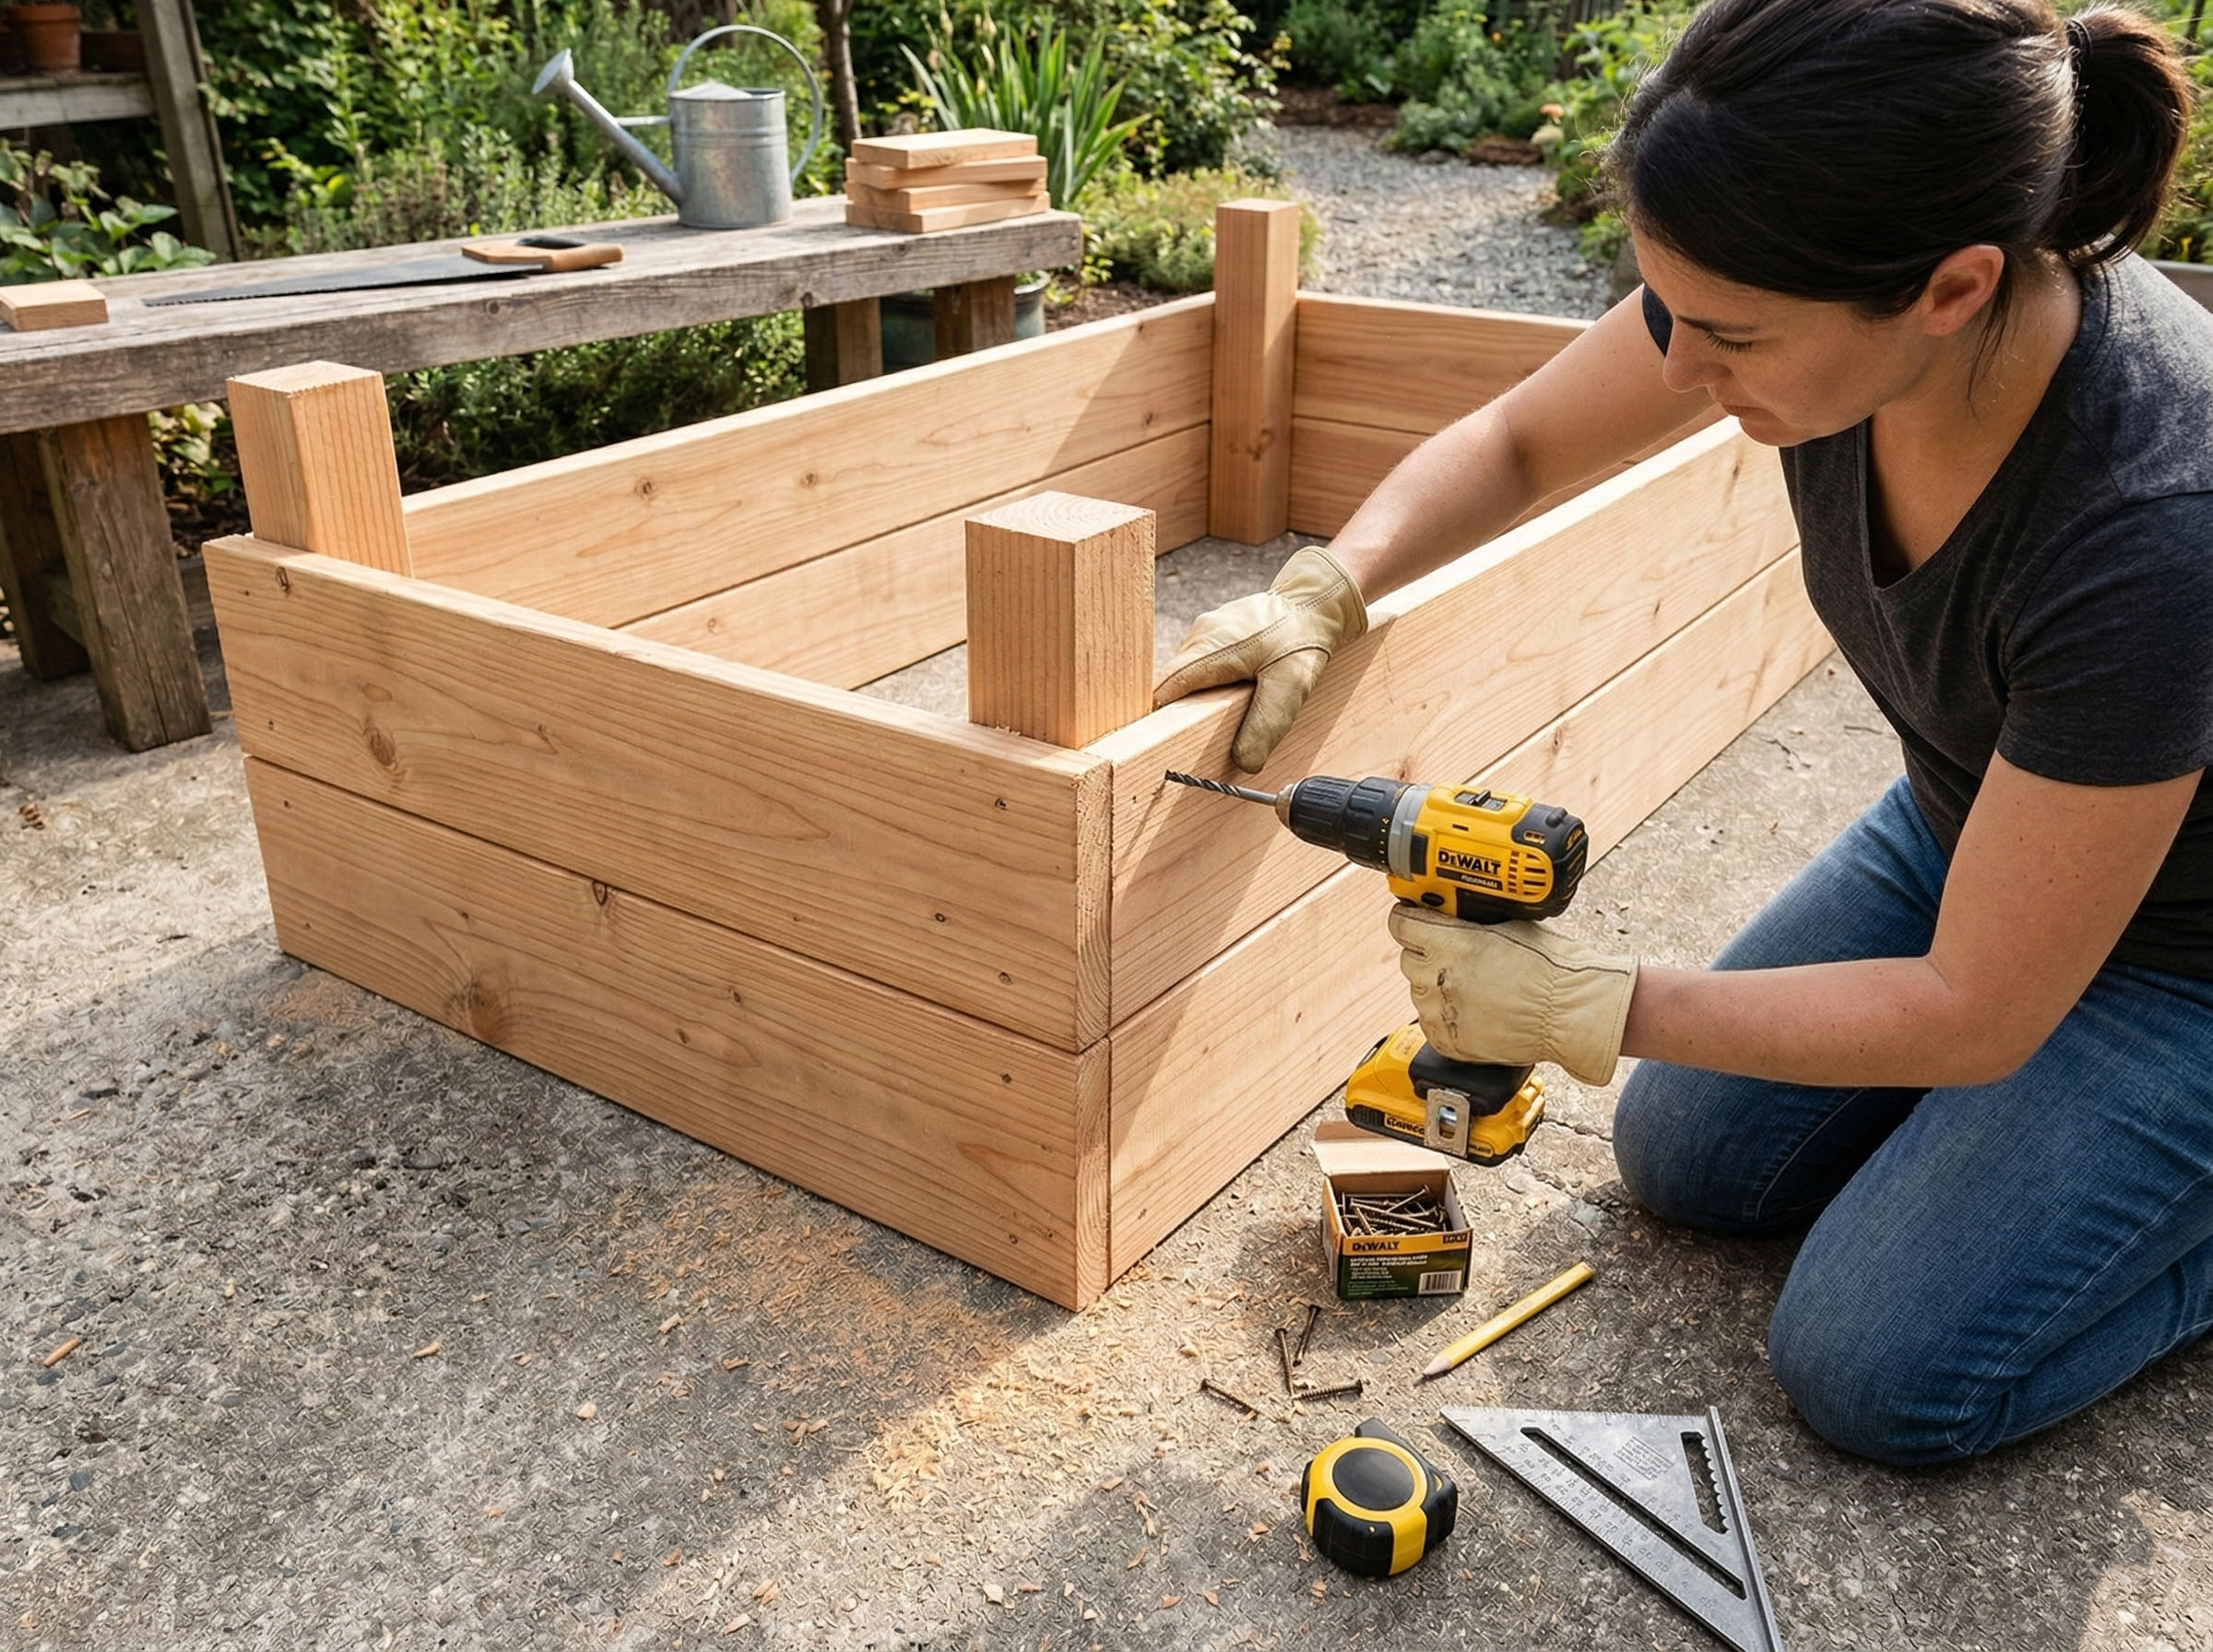
Step 3: Connect the Long Sides
Stand your end panels up and bridge them with the 8ft boards. Screw the 8ft boards directly into the 4x4 corner posts you installed in Step 2. Use at least two screws per board end for maximum stability.
Pro-Tip: Use a speed square during this step to make sure your corners are at a perfect 90-degree angle.
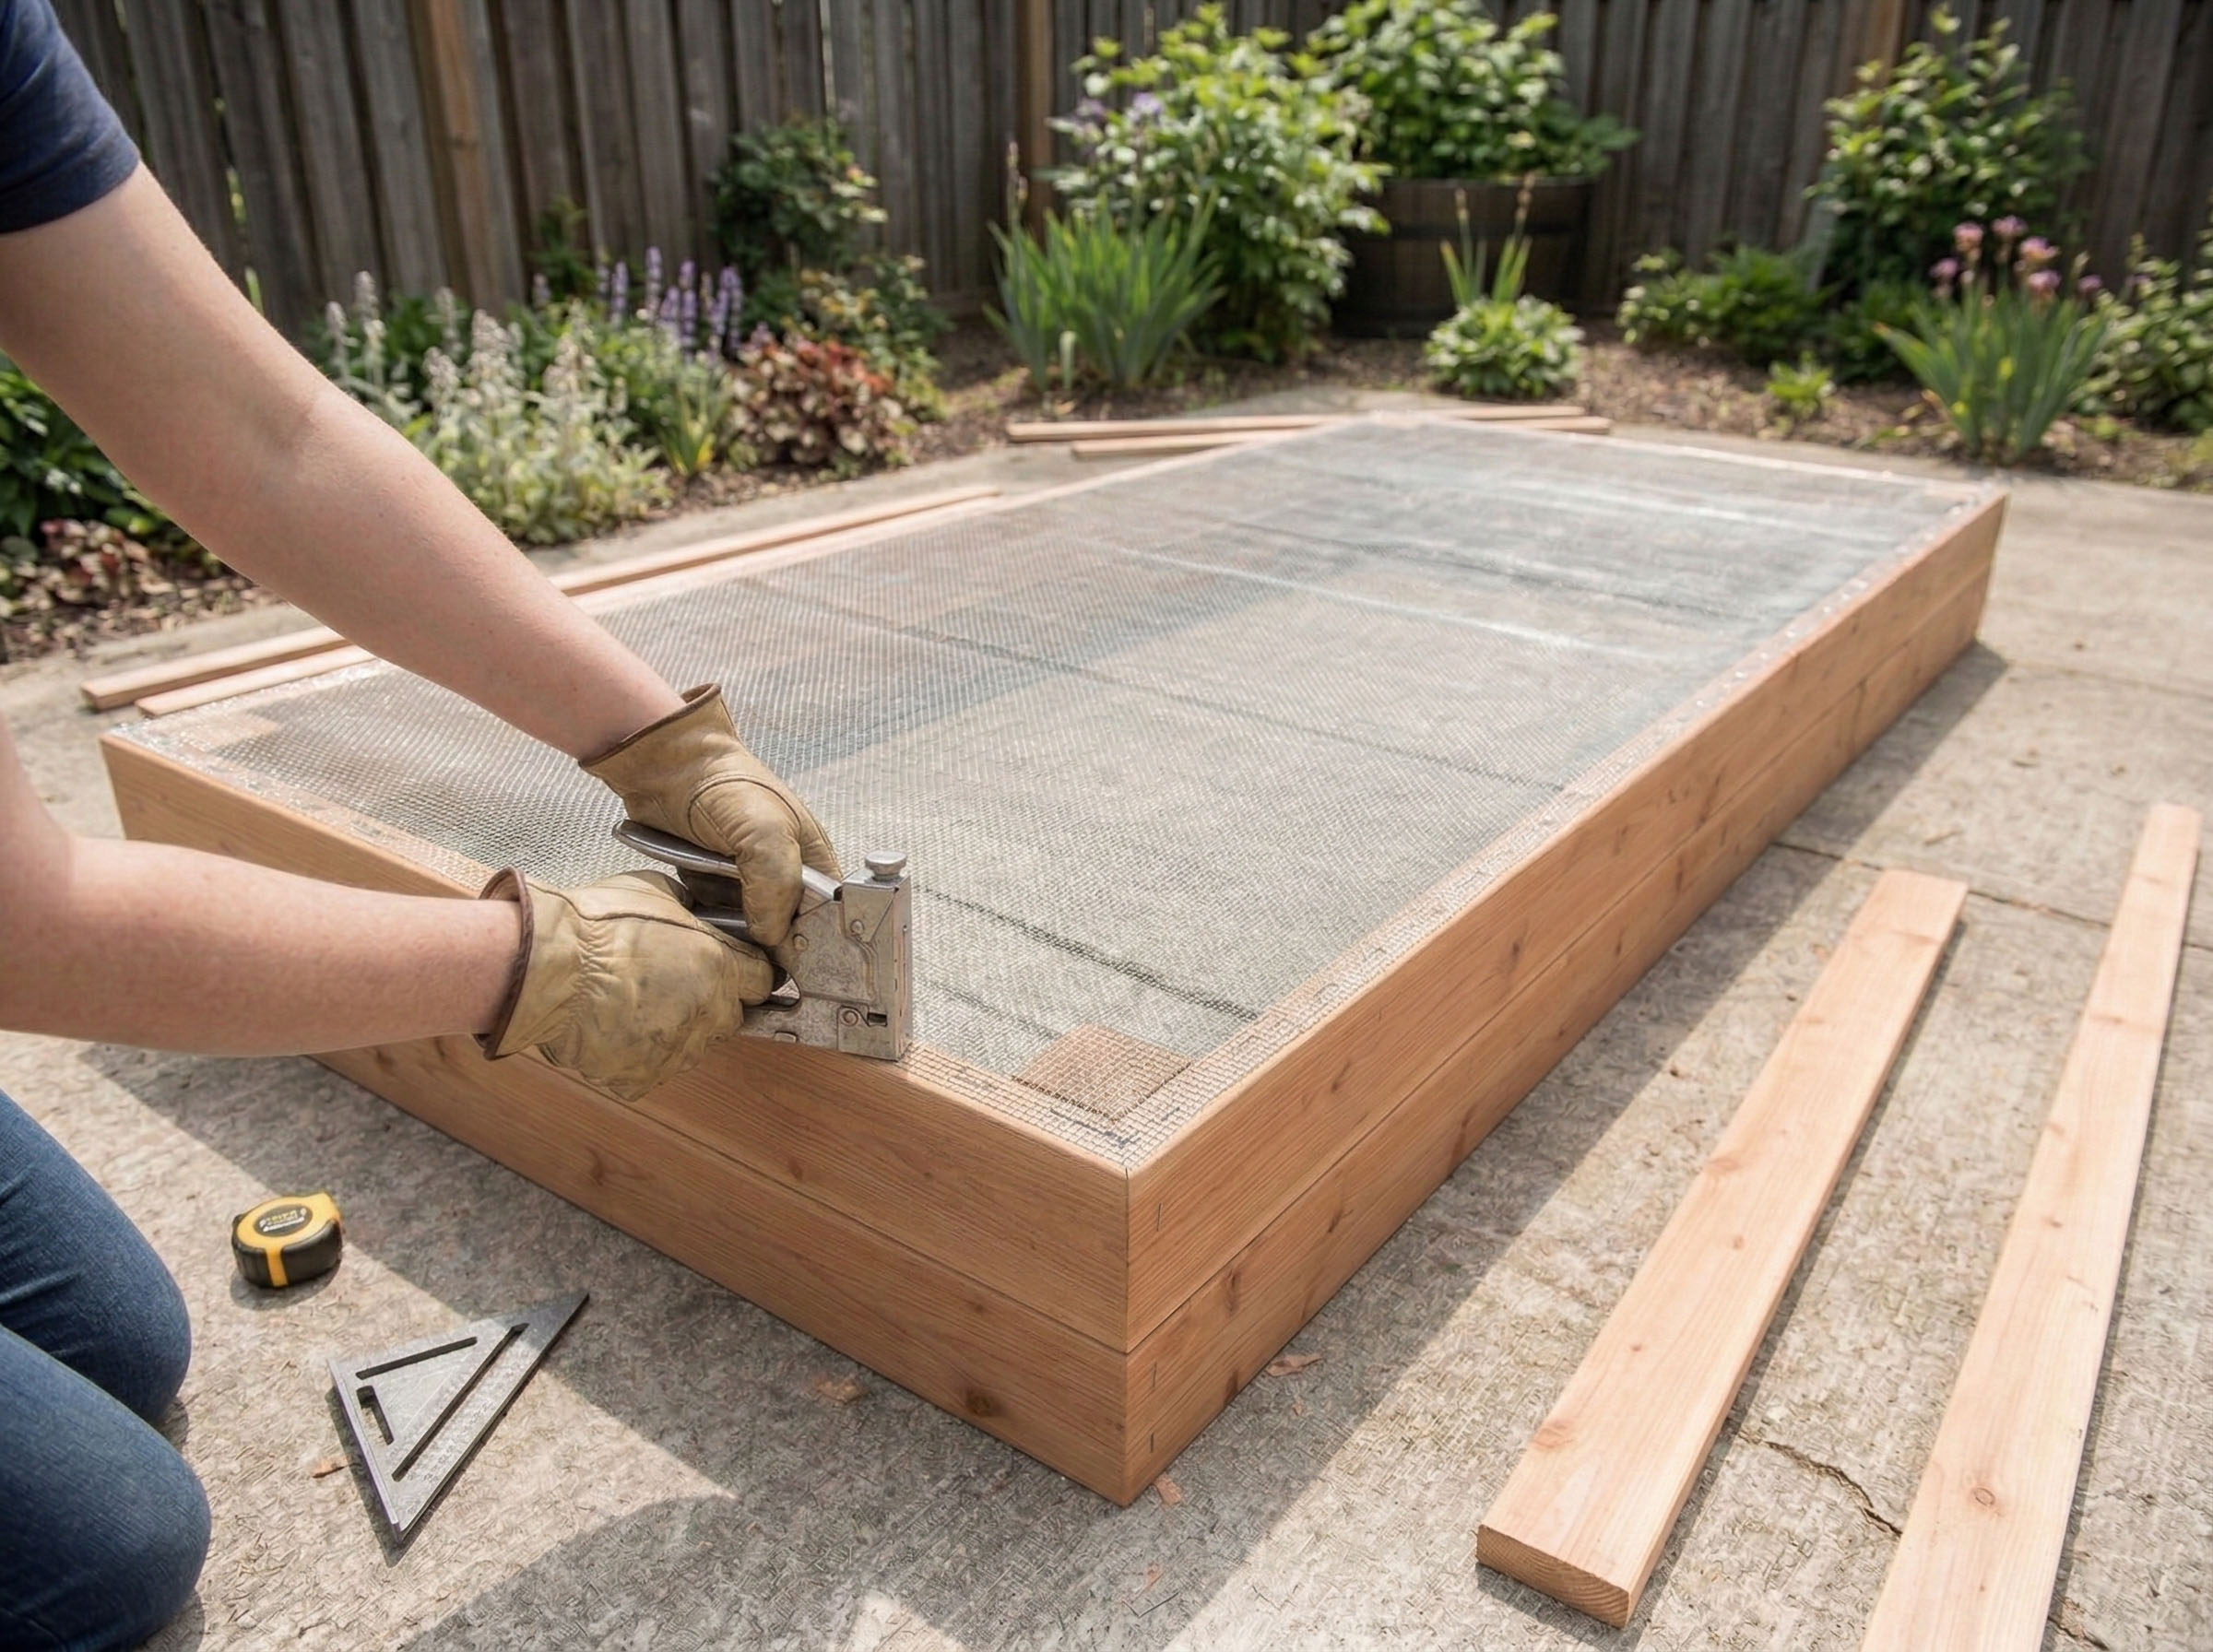
Step 4: Add the Protective Bottom
Flip the frame over. Staple the hardware cloth (the metal mesh) to the bottom of the wood. This is your "gopher guard." Layer the landscape fabric over the mesh to prevent soil from washing out while still allowing for drainage.
Pro-Tip: Use heavy-duty galvanized staples to ensure the mesh doesn't sag under the weight of the soil.
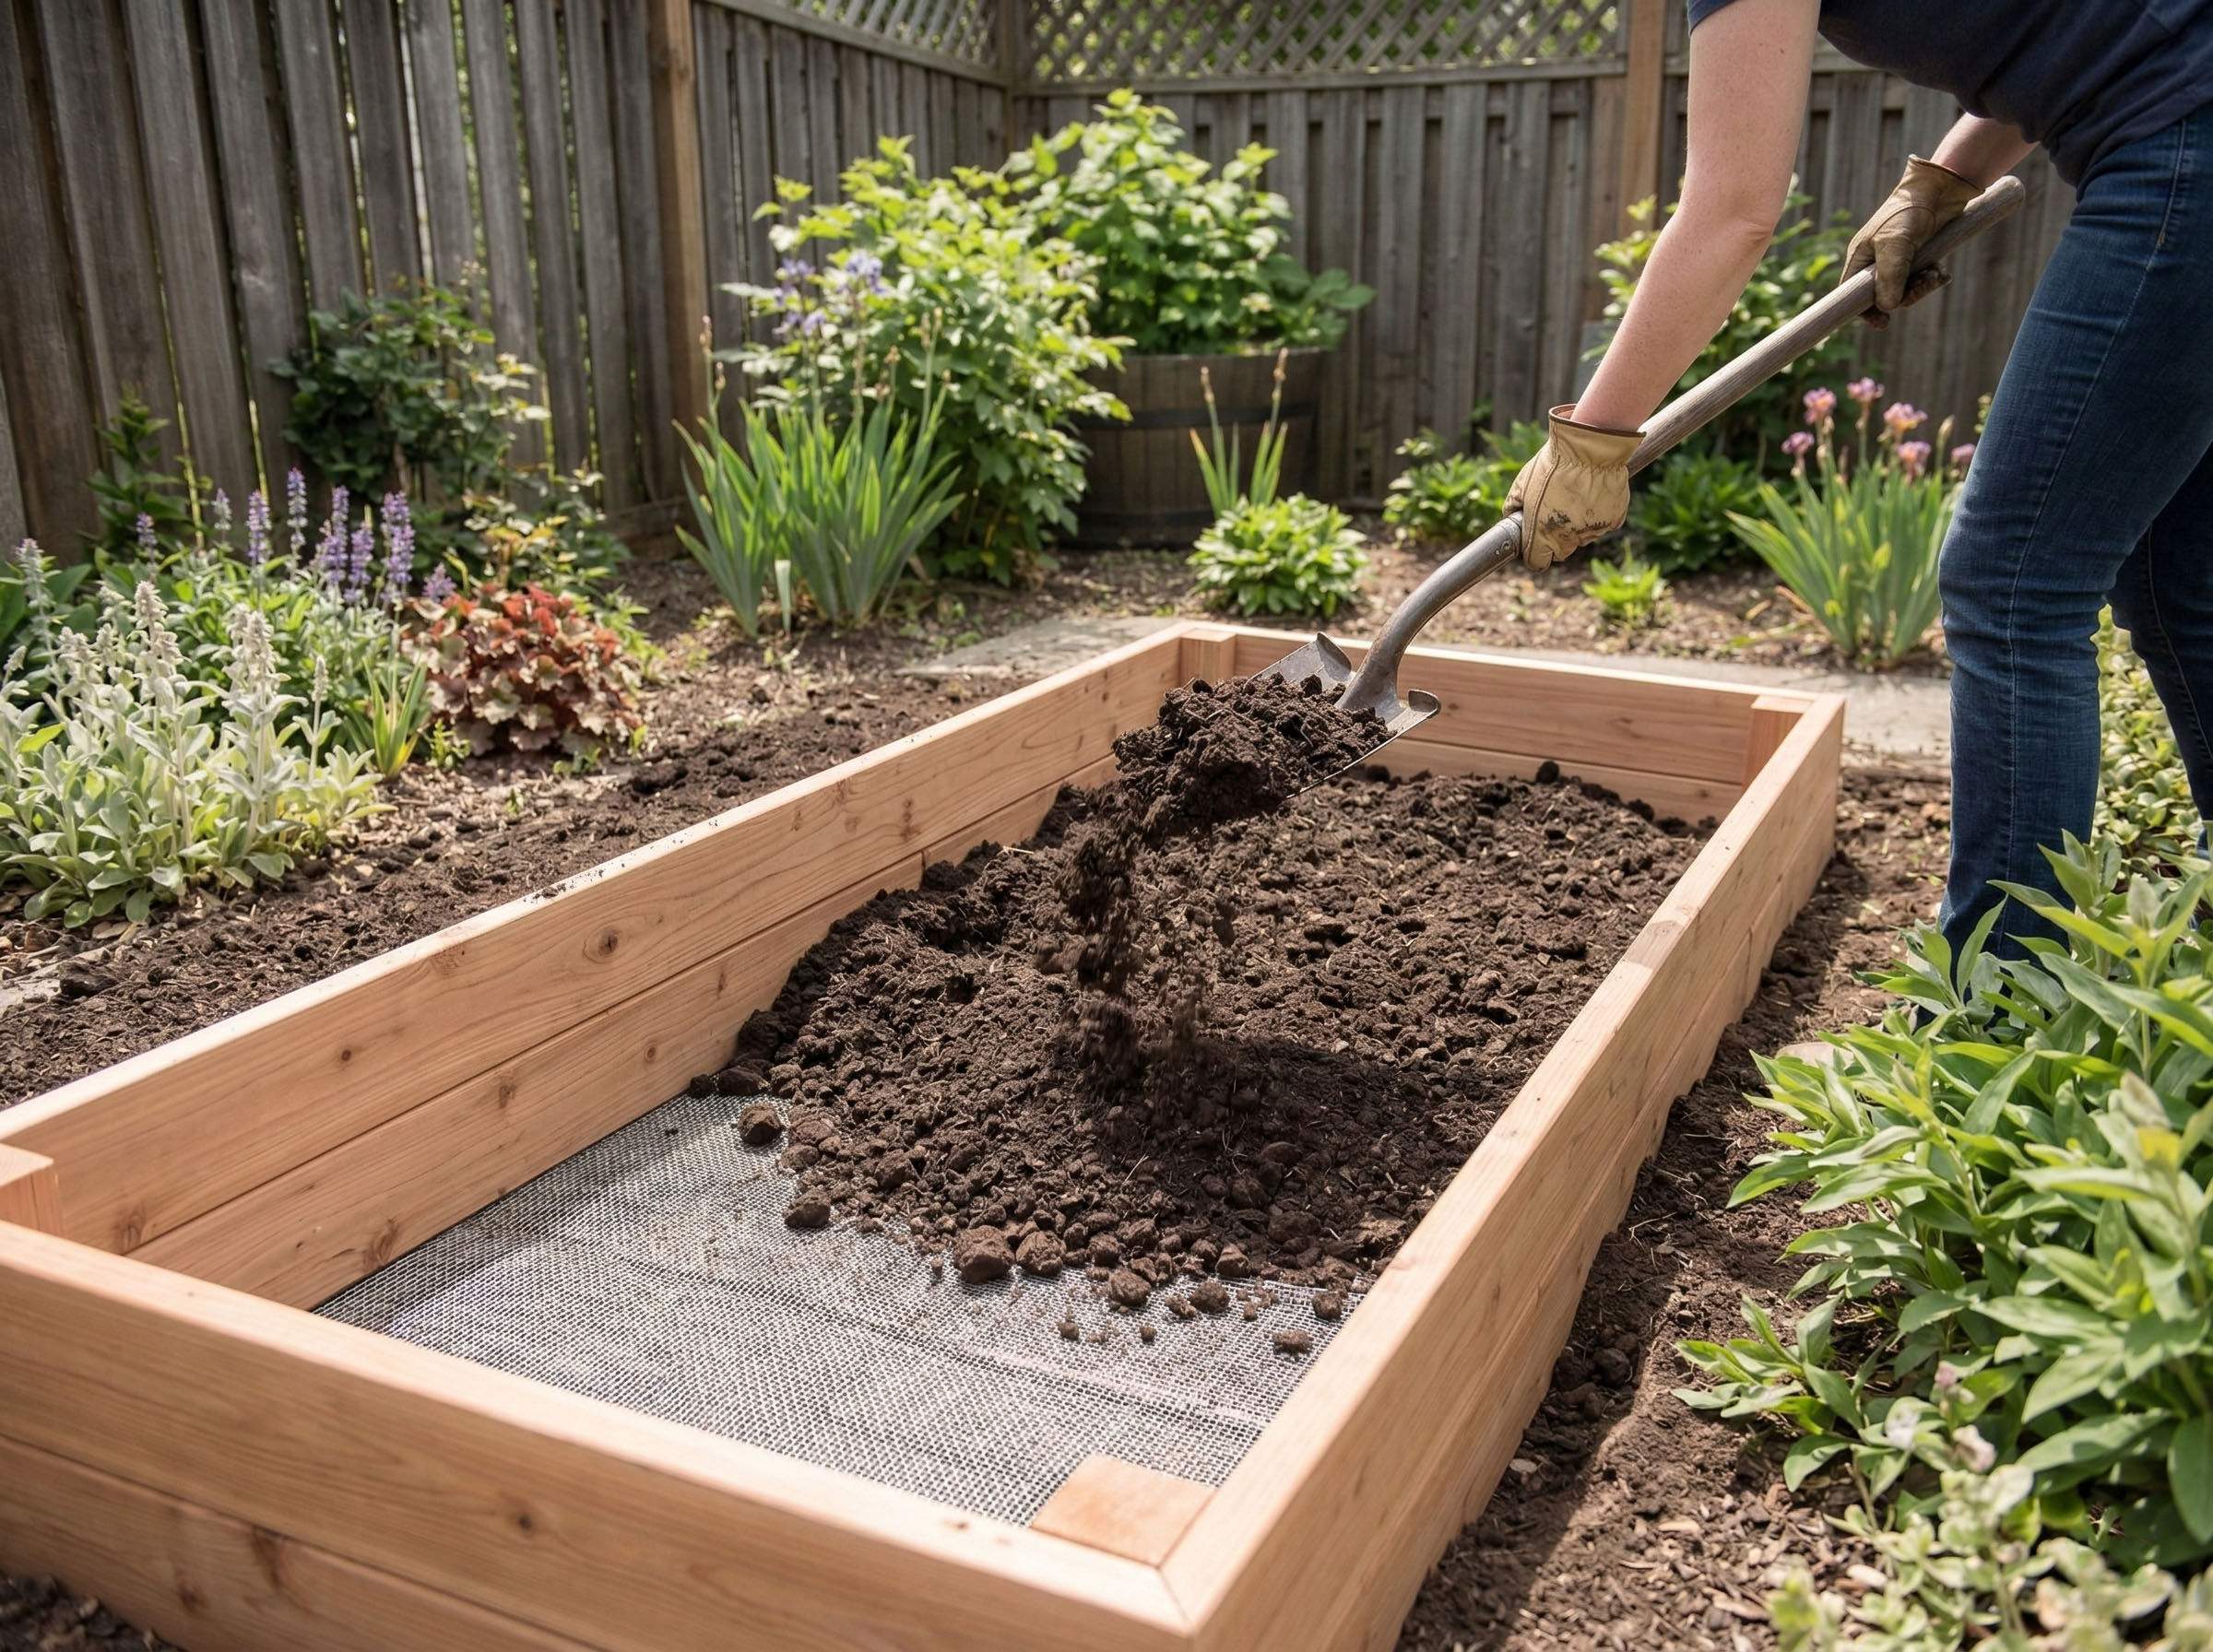
Step 5: Position, Level, and Fill
Move the bed to its final sunny location. Dig out a few inches of grass where the corners sit to "set" the bed into the earth. Use your level to ensure it isn’t leaning, then fill it with a 60/40 mix of high-quality topsoil and organic compost.
Pro-Tip: Fill the very bottom 2 inches with dried leaves or small sticks (the Hugelkultur method) to save on soil costs and provide long-term nutrients.
Conclusion
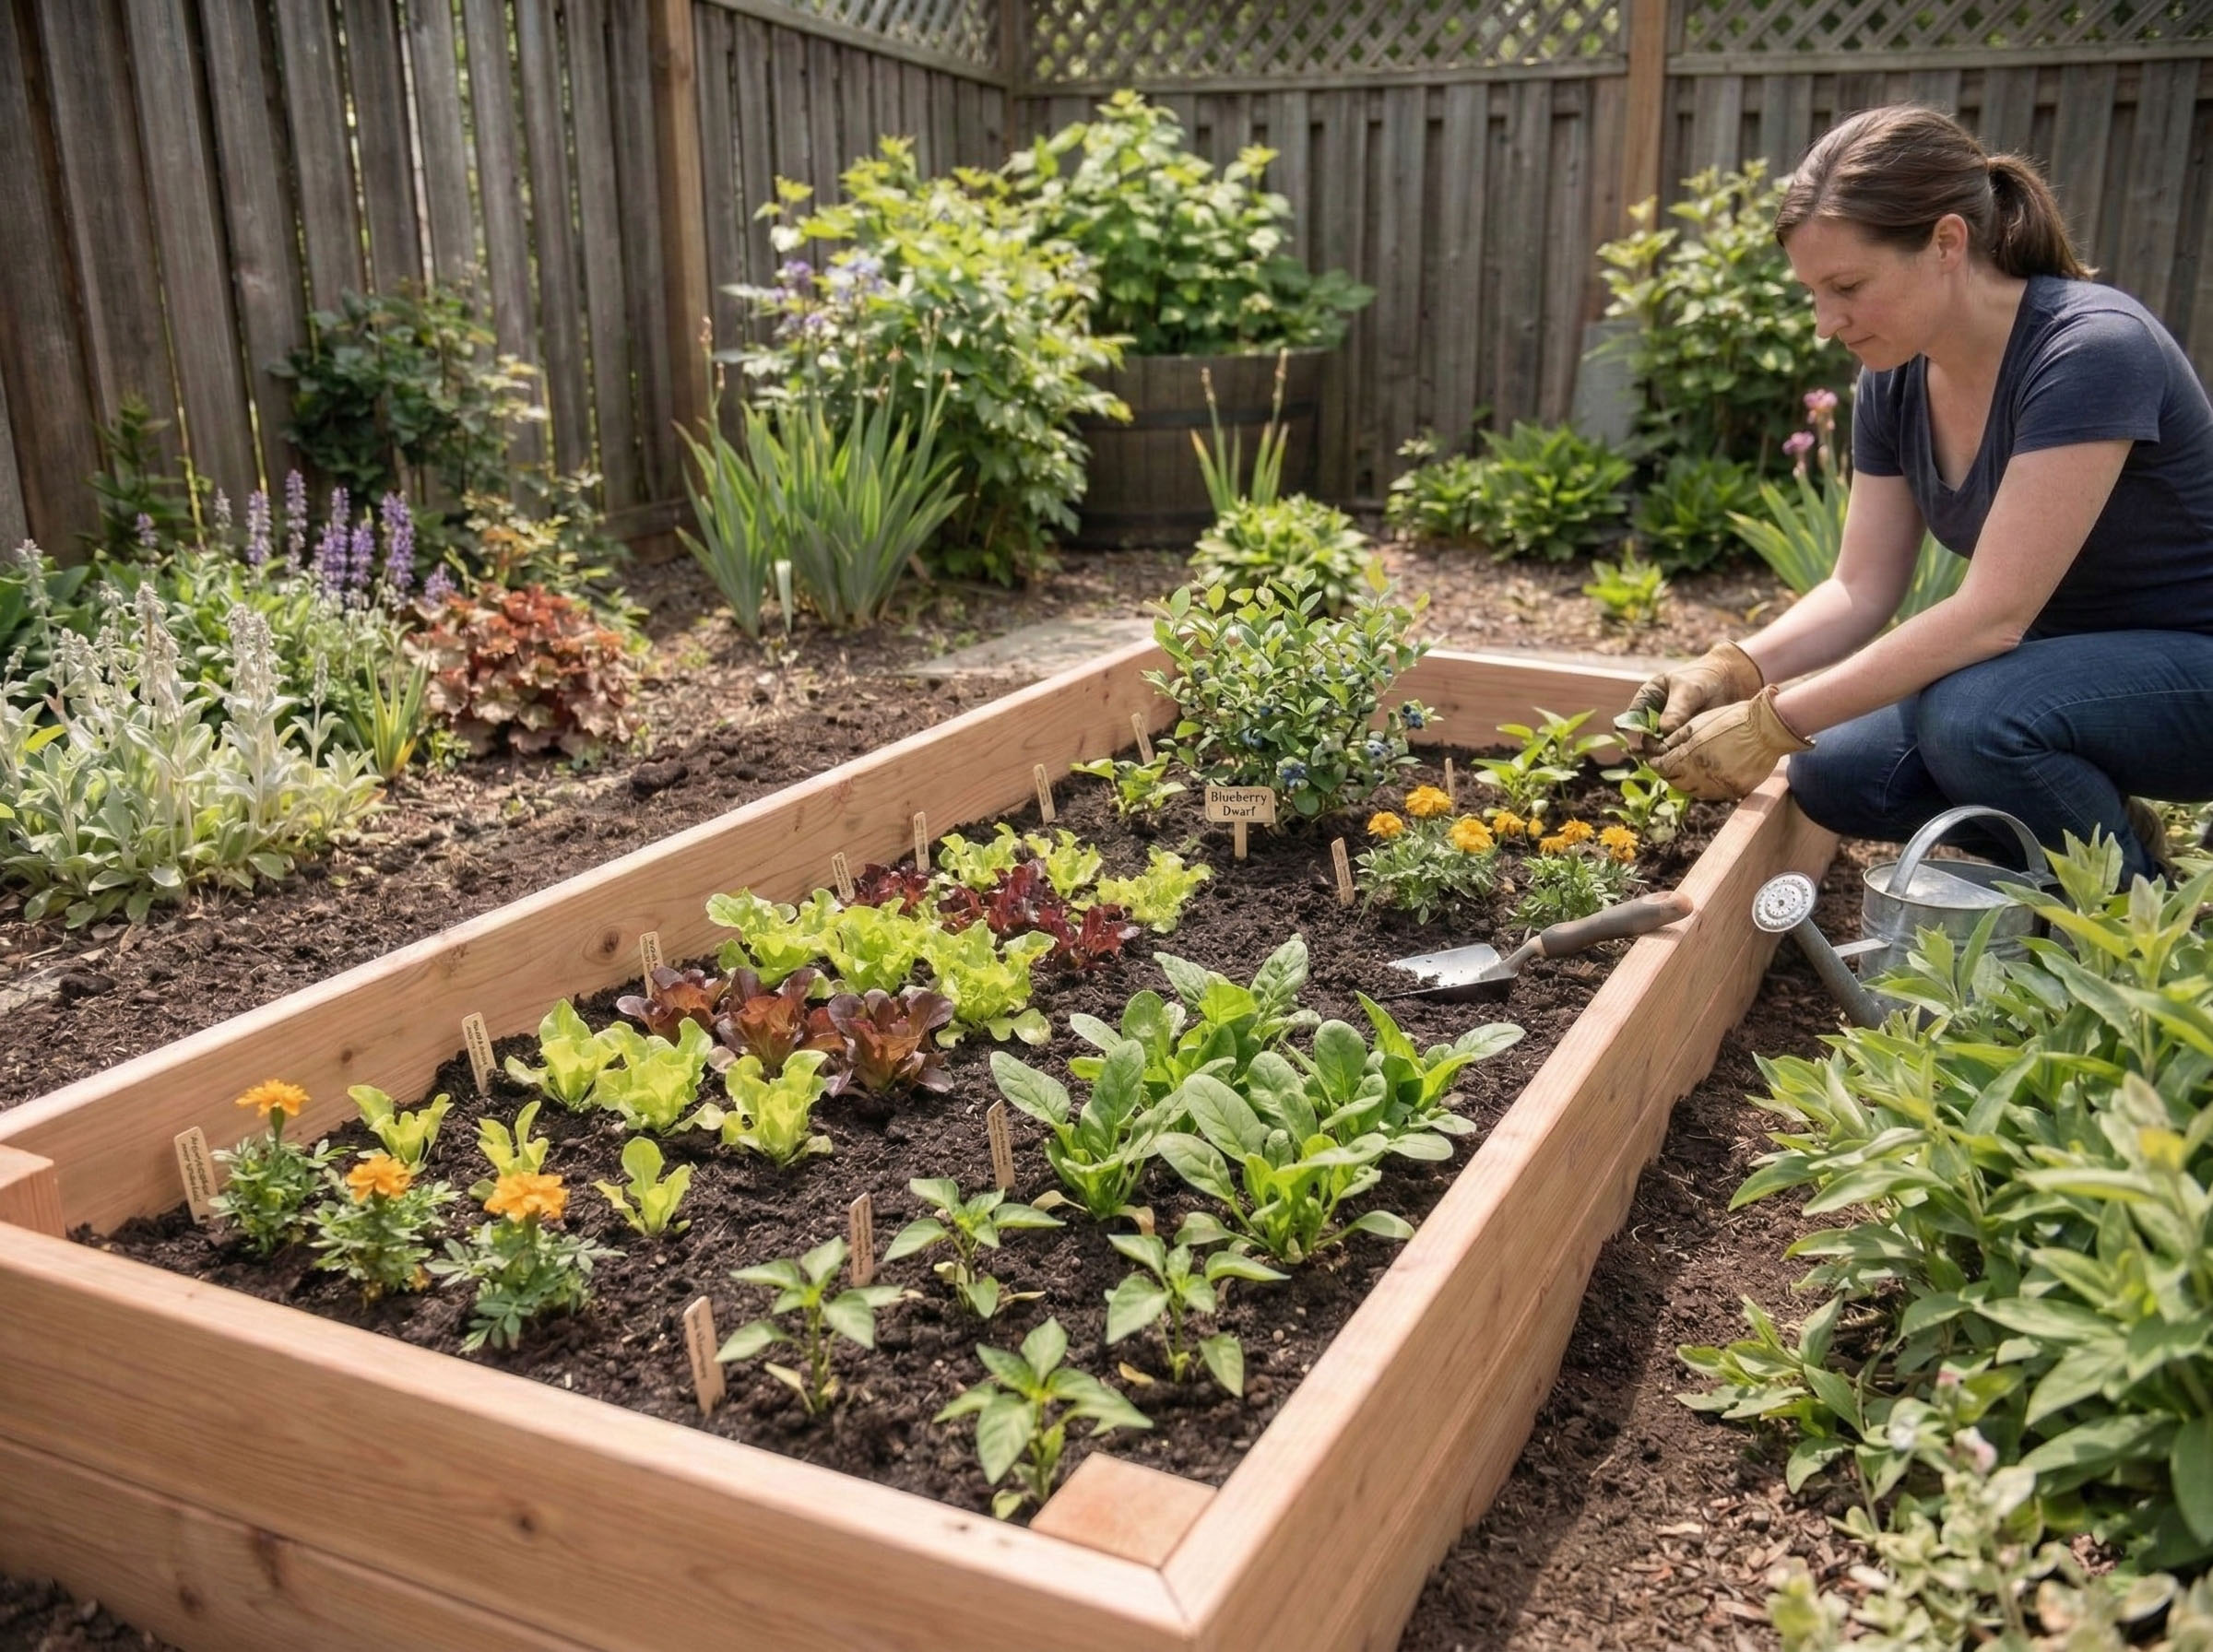
Your wife or significant other's new raised bed is now ready for her creative touch! She will have so much enjoyment from planning, planting, and harvesting from her custom-built garden. As a bonus, you can apply a food-safe outdoor oil once a year to maintain the cedar's natural beauty, or let it weather to a beautiful silvery-gray. She'll be styling her new garden in no time, and you'll get to enjoy the results too!
Disclaimer: The articles and information provided by Genital Size are for informational and educational purposes only. This content is not intended to be a substitute for professional medical advice, diagnosis, or treatment. Always seek the advice of your physician or another qualified health provider with any questions you may have regarding a medical condition.


